Dev Set-Up for MacOs with Neovim, Tmux, Python, Rust and Co
This post is primarily documentation for myself to assist in setting up a new laptop quickly. However, there may be valuable information for others, and I will provide a little bit of context and explanations. The main configuration lives in my dotfiles. Remember to apply critical thinking before copying, pasting, and piping bash into curl, etc.!
MacOs Settings
For Vim Glory
- Globally remap CapsLock to the Esc keys (who uses CapsLock for anything anyway?): Go to
System Settings > Keyboard > Keyboard Shortcuts > Modifier Keysand Remap CapsLock to Esc. - Allow key repeating to allow repeated input of, e.g., “hjkl” keys.
defaults write -g ApplePressAndHoldEnabled -bool false
Keyboard Settings
Keyboard Settings for delay and speed:

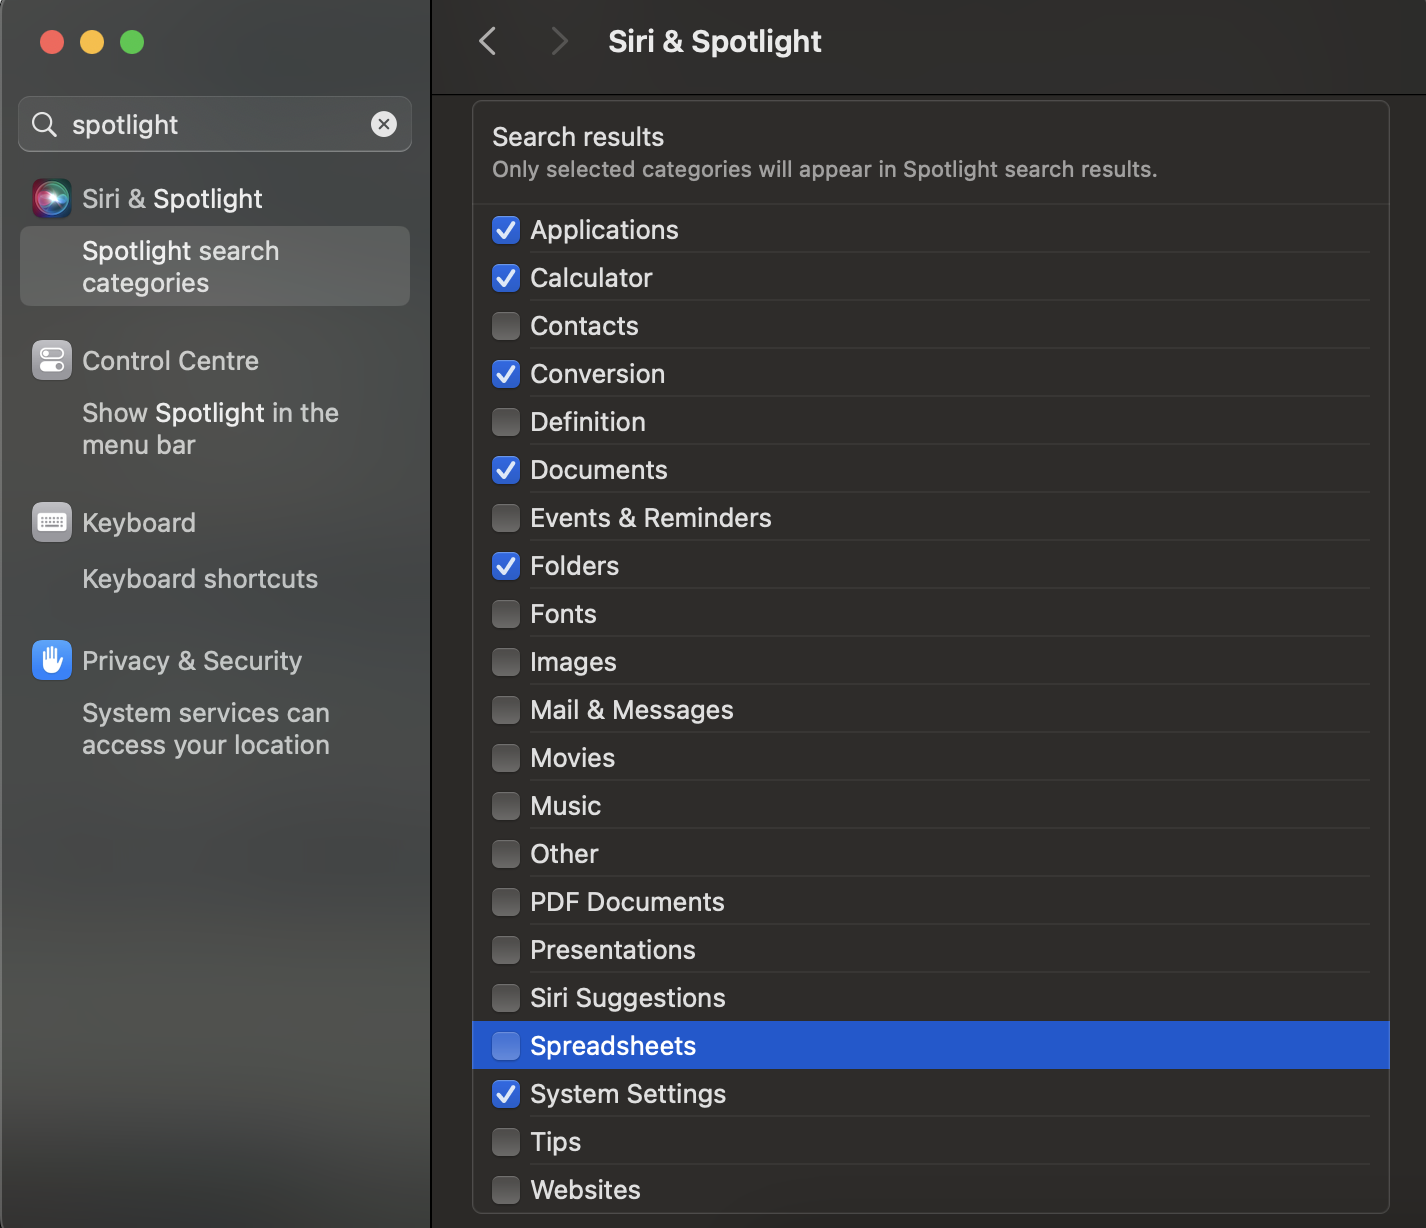
Configure Spotlight and deactivate Siri
Here is what I include in Spotlight searches:

Install Homebrew
/bin/bash -c "$(curl -fsSL https://raw.githubusercontent.com/Homebrew/install/HEAD/install.sh)"
Install (CLI - ) Apps
Every app on a new line to easily remove the ones not needed.
Formulae
My main development setup is based on Neovim and Tmux. My workflow is command line driven and I mostly rely on modern implementations such as ripgrep instead of grep and fd instead of find.
brew install \
  neovim \
  tmux \
  stow \
  bat \
  fzf \
  fd \
  eza \
  hyperfine \
  node \
  hugo \
  prettier \
  most \
  lazygit
Casks
Alacritty is a super snappy terminal with full configuration through files. Scroll-reverser automatically switches scrolling direction btw. trackpad and mouse. I’ll apply my Alacritty config later.
brew install --cask \
  alacritty --no-quarantine \
  chromium \
  scroll-reverser \
  signal \
  logseq
Work around missing notarization of Alacritty (boo Apple!)
The –no-quarantine flag doesn’t seem to be enough. Here are ways to work around the notarization. (Inform yourself!): https://github.com/alacritty/alacritty/issues/4673#issuecomment-771291615
Fonts
brew tap homebrew/cask-fonts
brew install --cask font-iosevka-term-nerd-font
Install AstroNvim
AstroNvim is a config system for Neovim that has nice IDE-features out of the box. See my other post about AstroNvim. This installs the base config and I’ll apply my own config later.
git clone --depth 1 https://github.com/AstroNvim/AstroNvim ~/.config/AstroNvim
Install OhMyZsh
sh -c "$(curl -fsSL https://raw.githubusercontent.com/ohmyzsh/ohmyzsh/master/tools/install.sh)"
Plugins
git clone https://github.com/zsh-users/zsh-autosuggestions.git $ZSH_CUSTOM/plugins/zsh-autosuggestions
git clone https://github.com/zsh-users/zsh-syntax-highlighting.git $ZSH_CUSTOM/plugins/zsh-syntax-highlighting
git clone https://github.com/TamCore/autoupdate-oh-my-zsh-plugins $ZSH_CUSTOM/plugins/autoupdate
The omz reload command reloads Oh My Zsh so that you have everything configured without re-starting the terminal.
For themes I use powerlevel10k. It’s fast, customizable, and easy to install with ohmyzsh.
git clone --depth=1 https://github.com/romkatv/powerlevel10k.git ${ZSH_CUSTOM:-$HOME/.oh-my-zsh/custom}/themes/powerlevel10k
… and follow the instructions.
Apply my Dotfiles
Create directory for all my repositories, clone my dotfiles and stow them. Stow is an easy to use application to manage the symlinks between their location in $HOME and the dotfiles repository. Before stowing, I have to delete default configs, such as .zshrc, first.
Note: If you are not me, you won’t be able to get my private submodule which, e.g., contains my .gitconfig.
rm ~/.zshrc
mkdir ~/Repos && cd ~/Repos && git clone git@github.com:SimonCW/dotfiles.git && cd dotfiles && make
omz reload
GNU CLI Tools
MacOS has its own flavor of some command-line tools. I want mine to behave the same as Linux, so I brew install the GNU Tools.
brew install coreutils ed findutils gawk gnu-sed gnu-tar grep make wget git gpg jq
By default, these tools are invoked with a “g” prefix, e.g., ggrep instead of grep. Avoid this by prepending them to your path by putting this into your .zshrc.
# Add Standard GNU Tools to path
# see: https://gist.github.com/skyzyx/3438280b18e4f7c490db8a2a2ca0b9da
if type brew &>/dev/null; then
  HOMEBREW_PREFIX=$(brew --prefix)
  NEWPATH=${PATH}
  # gnubin; gnuman
  for d in ${HOMEBREW_PREFIX}/opt/*/libexec/gnubin; do NEWPATH=$d:$NEWPATH; done
  for d in ${HOMEBREW_PREFIX}/opt/*/libexec/gnuman; do export MANPATH=$d:$MANPATH; done
 export PATH=$(echo ${NEWPATH} | tr ':' '\n' | cat -n | sort -uk2 | sort -n | cut -f2- | xargs | tr ' ' ':')
fi
Now, invoking grep invokes the GNU tools like on a Linux system.
For more info, you can see this discussion where I found the command, or check out / adapt the linuxify script. I chose the above approach because it gives me a bit more control.
Setup Programming Languages
Rust
brew install rustup-init
rustup-init
Python
My strong recommendation is to install mambaforge. Mambaforge is just a version of Miniconda that works with conda-forge as a default (among other advantages avoids ToS issues with Anaconda. It also has Mamba as a super-fast drop-in replacement for Conda installed in the base environment.
With the conda info command, you can check that the Apple Silicon Version was installed
brew install --cask mambaforge
conda init "$(basename "${SHELL}")"
omz reload
conda info
# platform : osx-arm64